
How to call a shell script using a custom keyboard shortcut in MacOS
Shell scripts and commands are a programmer’s superpower. They allow you to automate repetitive tasks and can make you 10x more productive. Recently, I leveled up these superpowers when I discovered that it is possible to bind your shell scripts and commands to a custom keyboard shortcut.
In Linux, it is straightforward to create custom keyboard shortcuts. All you need to do is open the Keyboard settings and search for the Custom Shortcuts settings 1. However, it is a bit more complicated in MacOS since you can only add custom keyboard shortcuts for services. Therefore, we must first create a custom service using Apple’s Automator application.
Creating a custom service
First, let’s open the Automator application. If you don’t know where it is located, you can use Spotlight to find it. When you open the Automator application, you will be asked to choose a type for your document. In our case, we want a Quick Action since these can be bound to custom keyboard shortcuts.
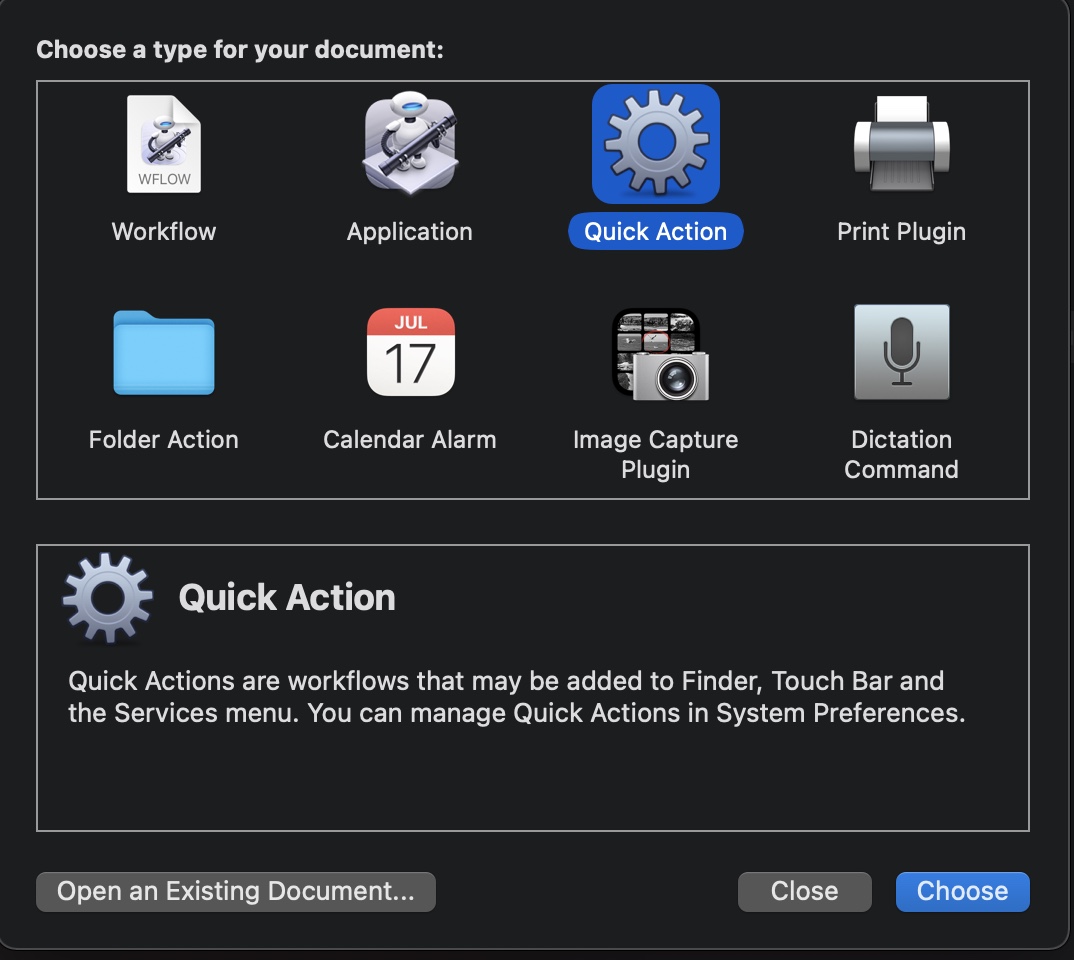
You should see this when you open the Automator application.
Quick Actions can be context-dependent. However, we want our custom keyboard shortcuts to work in any context. So to ensure that our custom shortcut can be used in any situation, make sure that you select that the Workflow receives no input in any application.
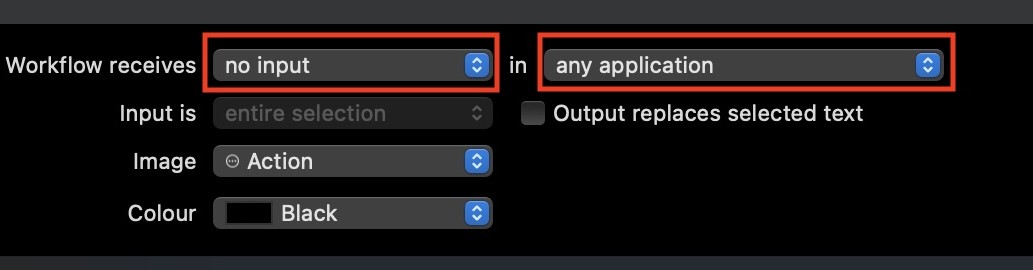
Your workflow needs this input configuration.
We want to run shell commands when we press our custom keyboard shortcut, so we need the Run Shell Script action. You can easily find it by typing “shell” in the action search bar:
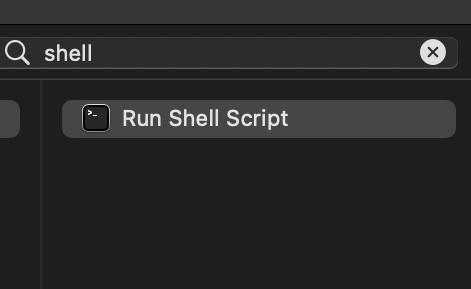
The Run Shell Script action looks like this.
Now drag and drop the Run Shell Script action into the workflow area.
After doing this, you can select your shell language, e.g., zsh, bash, python, etc.
After this choice, you can add your shell commands to the text box.
Pro-tip: you can test your shell command using the play button in the top right.
The output of the command will be displayed in the result tab below your Run Shell Script action.
One important thing to note is that the Run Shell Script action does not load the default environment and path.
If your script needs these, you need to do this manually.
For example, for zsh, you can do this by adding the source ~/.zshrc command.
However, be aware that this can slow down your script if your ~/.zshrc is very large.
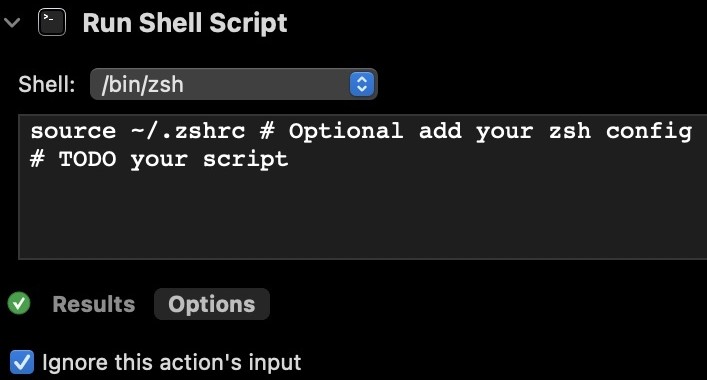
This is the Run Shell Script action where you put shell commands.
Binding the custom service to a keyboard shortcut
Now that we turned our shell script into a custom service, the only thing left to do is to give the service a custom keyboard shortcut. We can do this by going to the Keyboard Preferences in the System Preferences application. If you have created a Quick Action that receives no input in any application, you should now see it listed under services > general. If you click on your custom service, you get the option to select your keyboard shortcut. Now your shell script will run in the background every time you press your custom keyboard shortcut.
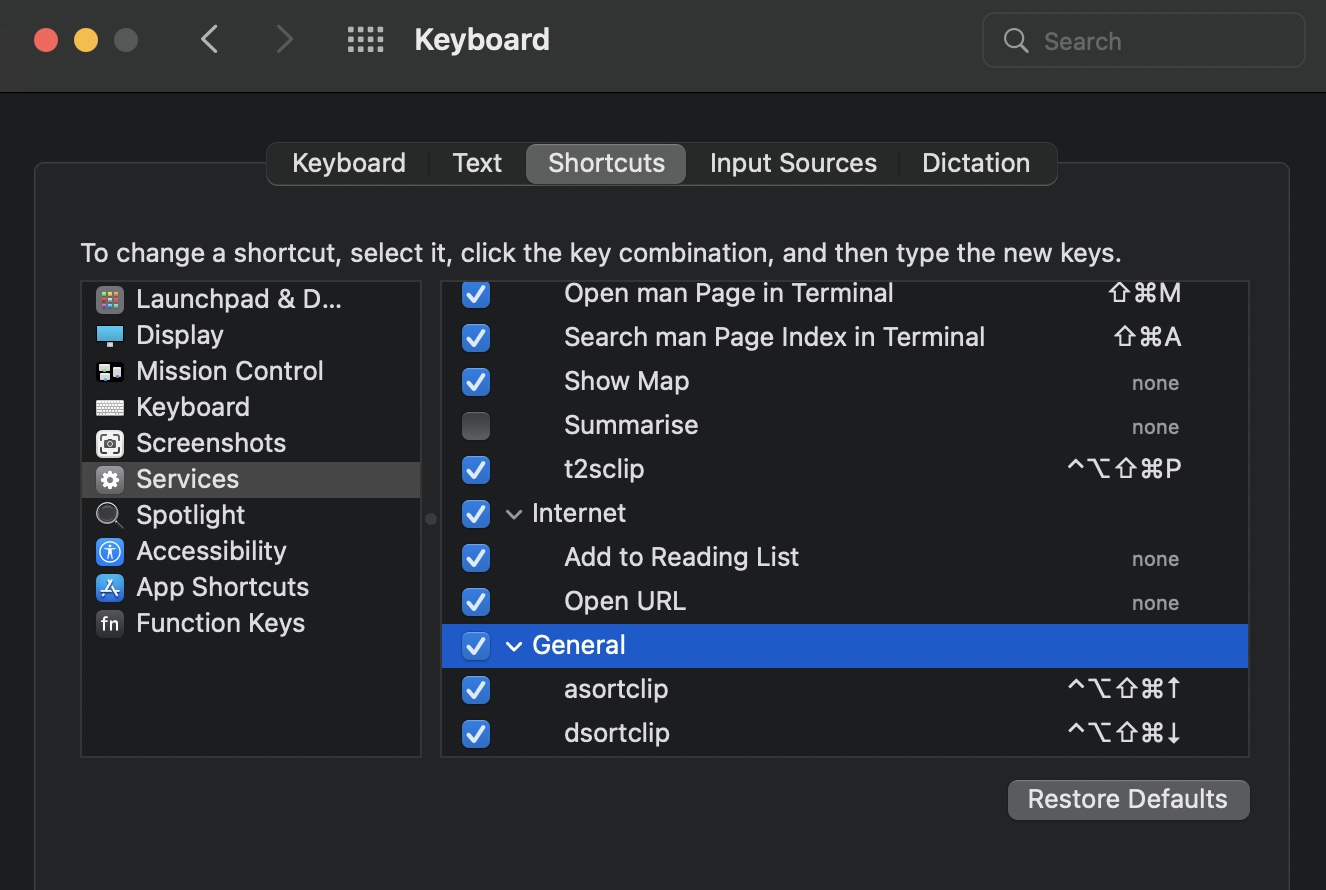
This is Keyboard Preferences where you can add your custom shortcut.
Wrapping up
Binding a shell script to a custom keyboard shortcut is a bit complicated in MacOS. However, knowing how to do it is incredibly powerful, especially if you combine it with the shell’s ability to change your clipboard. For example, I use many custom keyboard shortcuts that transform the text on my clipboard daily. The power to sort the text in your clipboard or change its capitalization is incredible. In a future post, I will share this magic with you. However, for now, I leave the possibilities up to your imagination.
These links show that it custom keyboard shortcuts are much easier in Ubuntu and Linux Mint. ↩︎